

5 Steps to Secure a Privacy Screen on a Deck
Table of Contents Secure a Privacy Screen
- Introduction
- Why Add a Privacy Screen to Your Deck
- Types of Privacy Screen Posts
- Tools and Materials Needed
- Step-by-Step Installation Guide
- Maintenance and Safety Tips
- Summary Table
- Reference Links
Introduction Secure a Privacy Screen
A well-secured deck privacy screen can transform your outdoor space into a secluded haven while adding value and style. Whether you're shielding your backyard from neighbors or blocking wind and sunlight, proper installation is crucial. In this article, we’ll walk you through the essential steps to secure a privacy screen on a deck, featuring premium modular solutions from the Patavin Privacy Screen Store.

Why Add a Privacy Screen to Your Deck
- Privacy: Block the view from neighbors or the street.
- Shade: Control sunlight for more comfortable use of your deck.
- Wind Protection: Reduce gusts that can disrupt outdoor activities.
- Noise Reduction: Dampen sounds from surrounding areas.
- Aesthetic Appeal: Enhance the look of your deck with modern screen styles.
Types of Privacy Screen Posts
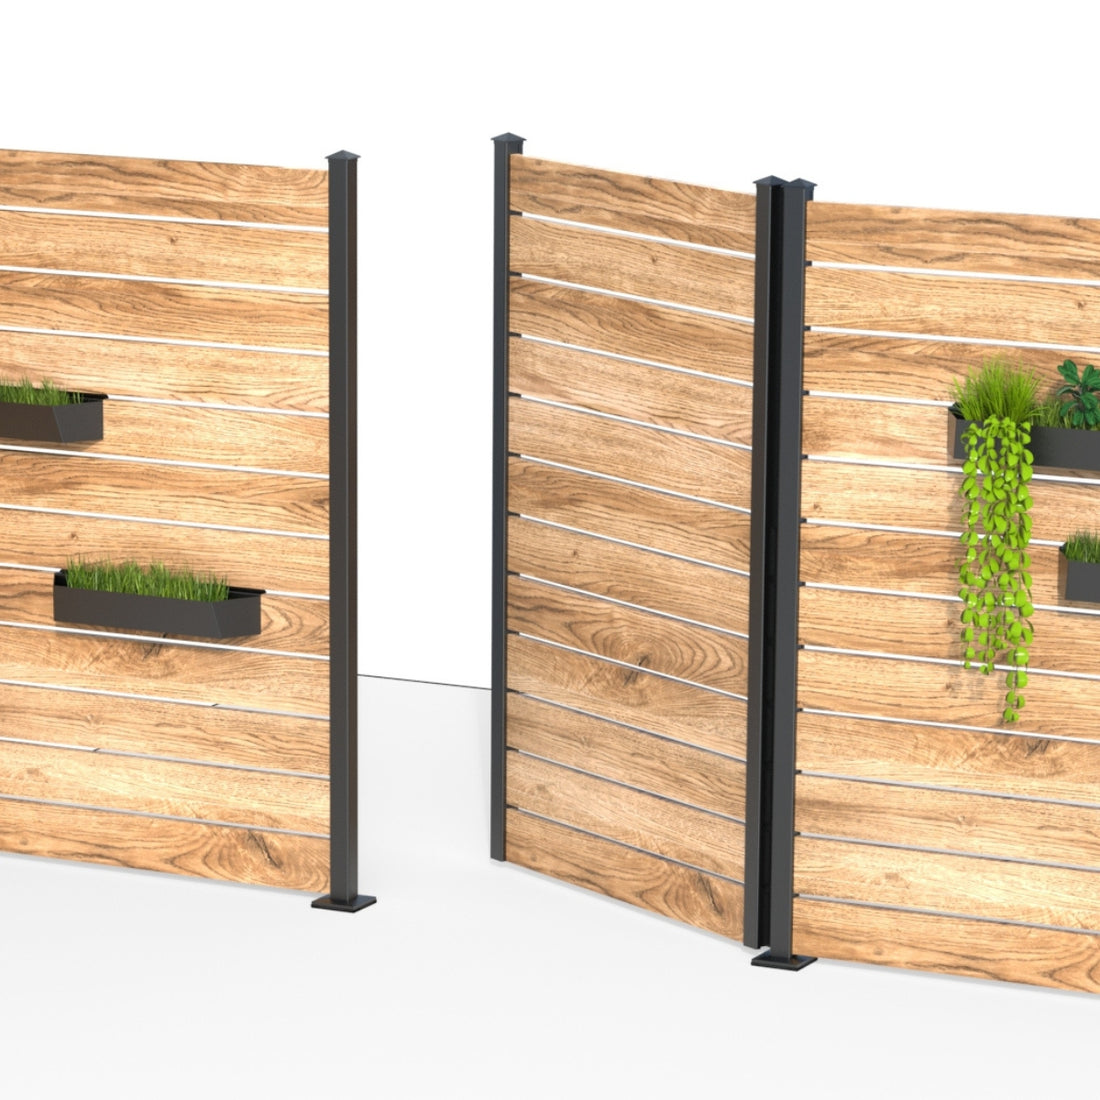
The Patavin Privacy Screen Store offers a wide selection of post kits suited for different layouts:
- End Post Kits: Used at the beginning or end of a screen wall.
- Line Post Kits: Used between two screen panels in a straight line.
- Corner Post Kits: Used to create 90° angles between screen panels.
Each Patavin kit includes durable hardware, premium aluminum posts, and modular panel mounts for easy installation and long-lasting strength. The company stands behind its products with a 100% quality guarantee and lifetime support.
Tools and Materials Needed

Before starting, gather the following tools:
- Measuring tape
- Power drill with appropriate bits
- Level
- Screwdriver (manual or electric)
- Deck screws or lag bolts
- Protective gear (gloves, safety glasses)
- Patavin post kits and screen panels
Step-by-Step Installation Guide
Step 1: Plan Your Layout
- Determine where you want your privacy screen to be placed.
- Measure your deck’s length and height to decide the number and type of posts needed.
- Mark the spots for each post (end, line, or corner) based on your layout.
Step 2: Install End Posts
- Start with a Patavin End Post Kit (E4 or E6) at the beginning of your layout.
- Align the base plate on the deck surface and use a level to ensure the post stands upright.
- Secure the post to the deck using lag bolts or screws. Most decks use wood or composite materials—make sure your fasteners are compatible.
Step 3: Add Line and Corner Posts
- Measure the distance between each post to match the width of your privacy screen panels.
- Install Line Post Kits (L4 or L6) where panels continue in a straight line.
- Use Corner Post Kits (C4 or C6) when turning 90° to form an L-shaped or U-shaped screen.
- Level each post as you go to avoid misaligned screens.
Step 4: Attach Privacy Screen Panels
- Slide or mount your privacy panels into the brackets provided in each Patavin kit.
- Secure panels with included fasteners or locking tabs.
- Double-check the alignment and tightness of each connection.
Step 5: Finishing Touches
- Inspect all posts and panels for gaps or instability.
- Tighten any loose bolts and clean the panels with a damp cloth to remove fingerprints or dust.
- Optional: Add decorative caps to posts for a polished finish.
Maintenance and Safety Tips
Regular Checks
- Inspect posts and panels monthly for stability.
- Look for signs of rust or wear on bolts and replace if needed.
Cleaning Tips
- Use mild soap and water to clean screen panels.
- Avoid abrasive materials that could scratch the finish.
Seasonal Considerations
- Before winter, check that all fasteners are tight to avoid damage from snow or wind.
- In storm-prone areas, consider temporary screen removal or reinforcement.
Summary Table
| Component | Description | Use Case |
|---|---|---|
| End Post Kit 44" - E4 | Short end post for modular decks | Start or end of screen layout |
| Line Post Kit 44" - L4 | Mid-point post for connecting two panels | Straight-line installations |
| Corner Post Kit 44" - C4 | Corner post for right-angle turns | Deck corners or L/U shapes |
| End Post Kit 6' - E6 | Taller post for increased coverage | Start or end with higher privacy |
| Line Post Kit 6' - L6 | Mid-line tall post | Higher straight-line applications |
| Corner Post Kit 6' - C6 | 6' corner post for full-height screens | High-profile corner turns |