

How to Add Privacy to a Chain Link Fence: 2025 Guide
Table of Contents
- Introduction
- Why Add Privacy to Chain Link Fences
- Common Privacy Solutions
- Installing Fabric or Slats
- Installing Hanging Screens / Panels
- Using Modular Panel Kits
- Maintenance & Care Tips
- Summary Table
Introduction

Chain link fences are economical and durable, but often lack privacy, aesthetics, and noise reduction. In 2025, homeowners and renters alike seek effective ways to transform their chain link into private, attractive barriers. This guide outlines step-by-step methods—from slats and fabrics to innovative modular panel kits like the PATAVIN modular privacy fencing CORNER POST KIT 6' - C6—to help you create a stylish, functional fence.
Why Add Privacy to Chain Link Fences
- Visual Screening: Block neighbor's view and increase aesthetics
- Noise Reduction: Certain materials help muffle traffic and pet sounds
- Security & Safety: Deters intruders and keeps pets in
- Wind & Dust Barrier: Helps protect gardens and outdoor areas
Common Privacy Solutions
1. Privacy Fabric & Slats

- Woven fence mesh or plastic slats you push vertically through links
- Easy DIY approach and low cost
- Available in varying densities—80% block to fully opaque
2. Hanging Privacy Screens & Panels
- Pre-made mesh or woven screens, secured with zip-ties or clips
- Fast installation, often mildew-resistant
- Can be rolled back when needed
3. Landscaping & Greenery
- Plant shrubs, vines, or bamboo along fence line
- Provides natural beauty and wind buffering
- Longer timeline and needs upkeep
4. Modular Panel Systems
- Standalone panels (wood/composite) attached to existing posts
- New modular kits like PATAVIN CORNER POST C6 allow durable alley extensions
- Stylish, customizable, and easy to install or modify
Step-by-Step: Installing Fabric or Slats

- Measure fence height and length accurately
- Choose slat style and density (privacy level)
- Insert slats top to bottom or vice versa to prevent slipping
- Secure ends with zip-ties or metal clips
Tip: Overlap slats at ends for a seamless look, and trim excess at top.
Step-by-Step: Installing Hanging Screens or Panels
- Unroll or unfold panels and line them against fence
- Periodically fix them with UV-resistant zip-ties or fence clips
- Tension evenly to avoid sagging
- Create overlapping seams between sections for continuous privacy
Step-by-Step: Installing Modular Panel Kits
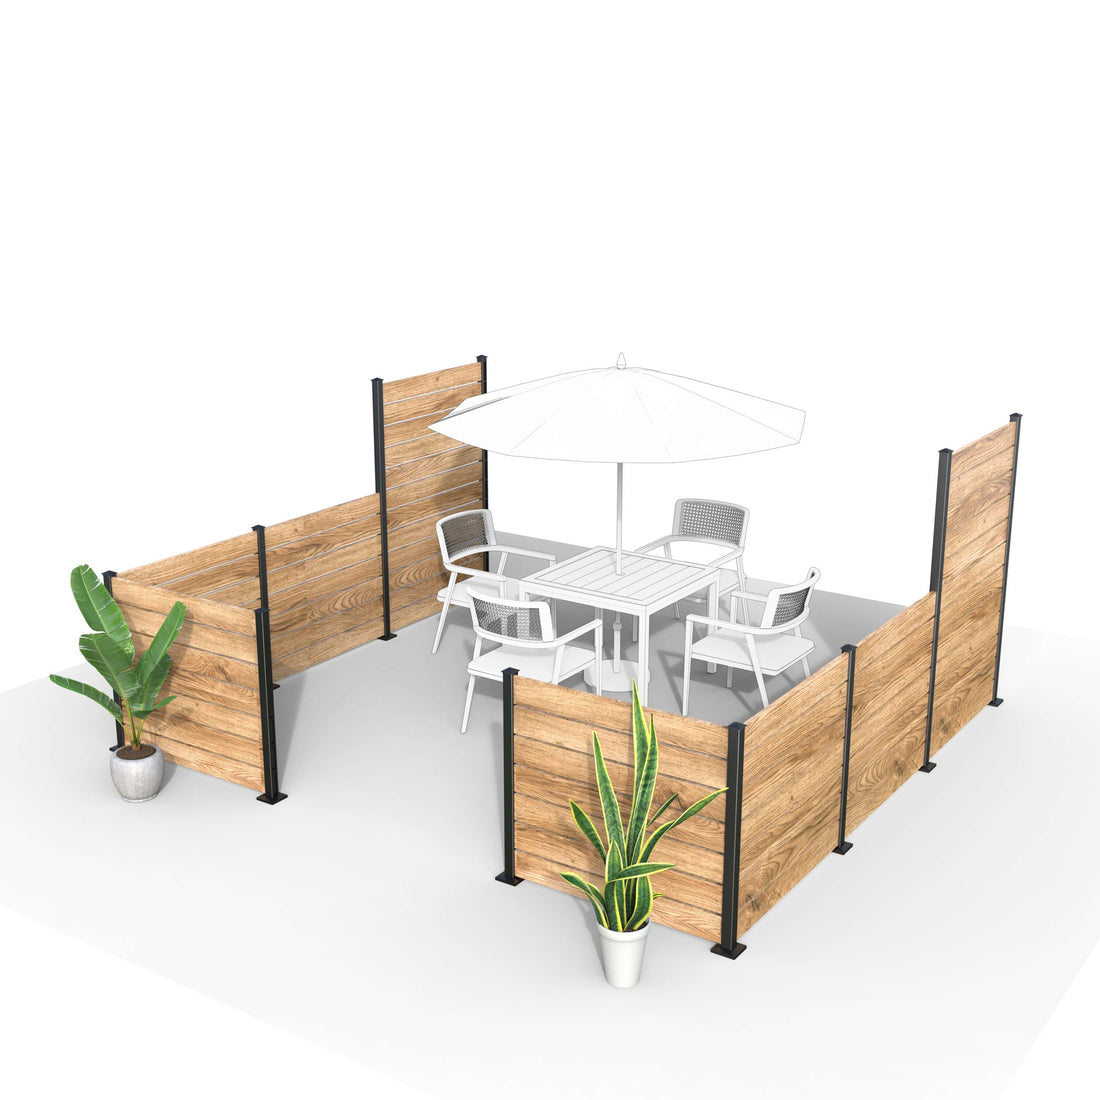
Modular kits, such as the PATAVIN CORNER POST KIT C6, provide a permanent, adjustable, and stylish fencing alternative:
- Corner Post & Rail System: Rustproof powder-coated aluminum provides durable support
- Nail-Free Sliding Rail: Insert 5/4" wood or composite planks without drilling
- Instant Assembly: Prefabricated slots mean fast setup and future adjustments
- Universal Compatibility: Works with various plank materials and finishes
- Industrial Durability: Built for permanent use in yards, patios, or balconies
- Post Specs: 16″×2.16″×72″, ready for standard boards; accessories and screws sold separately
Installation Steps:
- Prepare post hole or surface mount depending on setup
- Install corner post plumb and level
- Slide planks into slot rails—adjust height as needed
- Add adjacent panels or extra posts to complete perimeter
Maintenance & Care Tips
- Occasionally spray fabric or panels to reduce dirt buildup and mildew
- Inspect modular posts and rails for debris—keep slots clean
- Treat wood boards annually if using composite/wood materials
- Trim plants to prevent damage to screens and slats
Summary Table
| Method | Advantages | Drawbacks |
|---|---|---|
| Privacy Slats | Cost-effective, easy to install, adjustable opacity | Less natural look, degrade over time |
| Hanging Screens | Quick, removable, mildew-resistant options | Visible mounting, less durable |
| Landscaping | Natural look, environmental benefits | Slow growth, needs care |
| Modular Panel Kits (PATAVIN C6) | Permanent, stylish, universal, easy assembly | Higher upfront cost, requires posts/mounting |